Real Crafting
Real Crafting is Yo.Town Maker's professional 3D sculpting and modeling tool. It offers powerful carving features and rich auxiliary tools so you can freely add bases, cutouts, split hinges, decorations, and more to existing 3D models.
Features
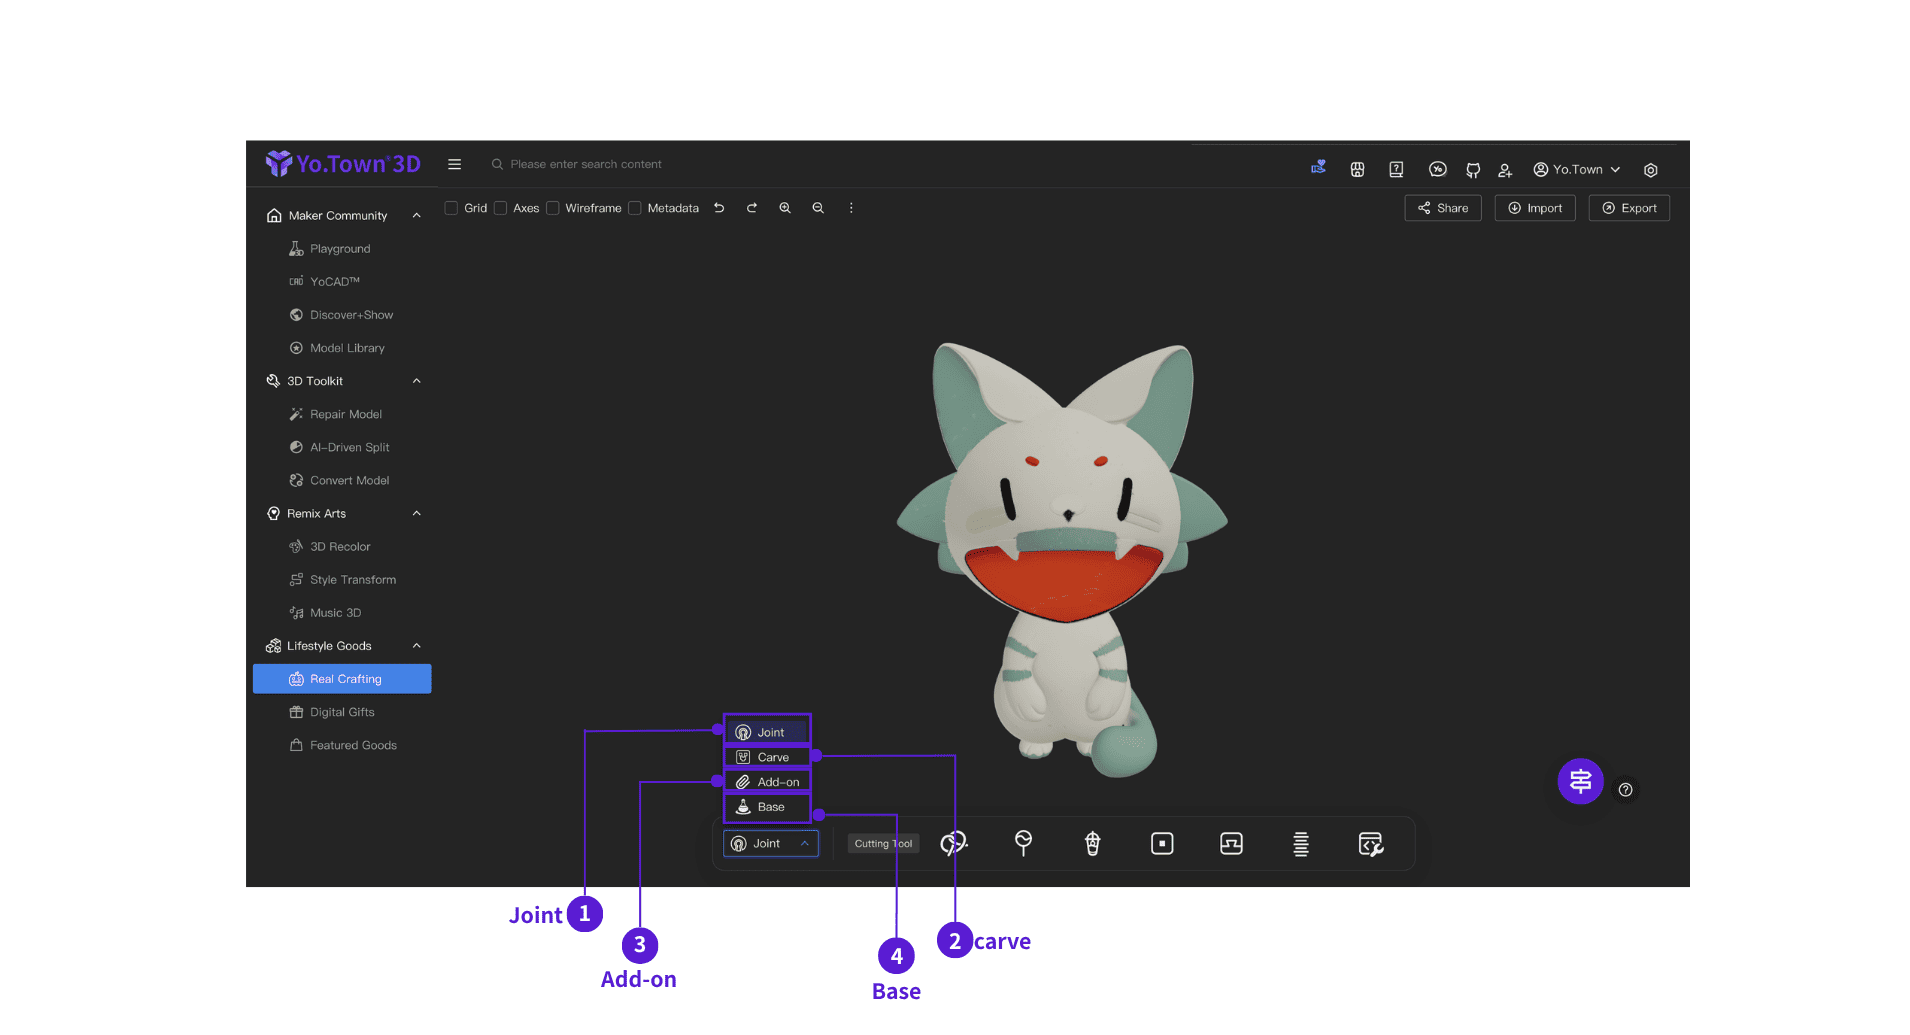
- ⓵ Joint: Quickly create mortise-and-hinge connections for easier assembly
- ⓶ Carve: Shape surface details like clay carving
- ⓷ Add-on: Attach extra parts to the model to build a more suitable form
- ⓸ Base: Add a base or display stand to improve placement and presentation
Control Panel
The control panel is at the bottom with three main tabs: Carve, Add-on, and Base.
Joint
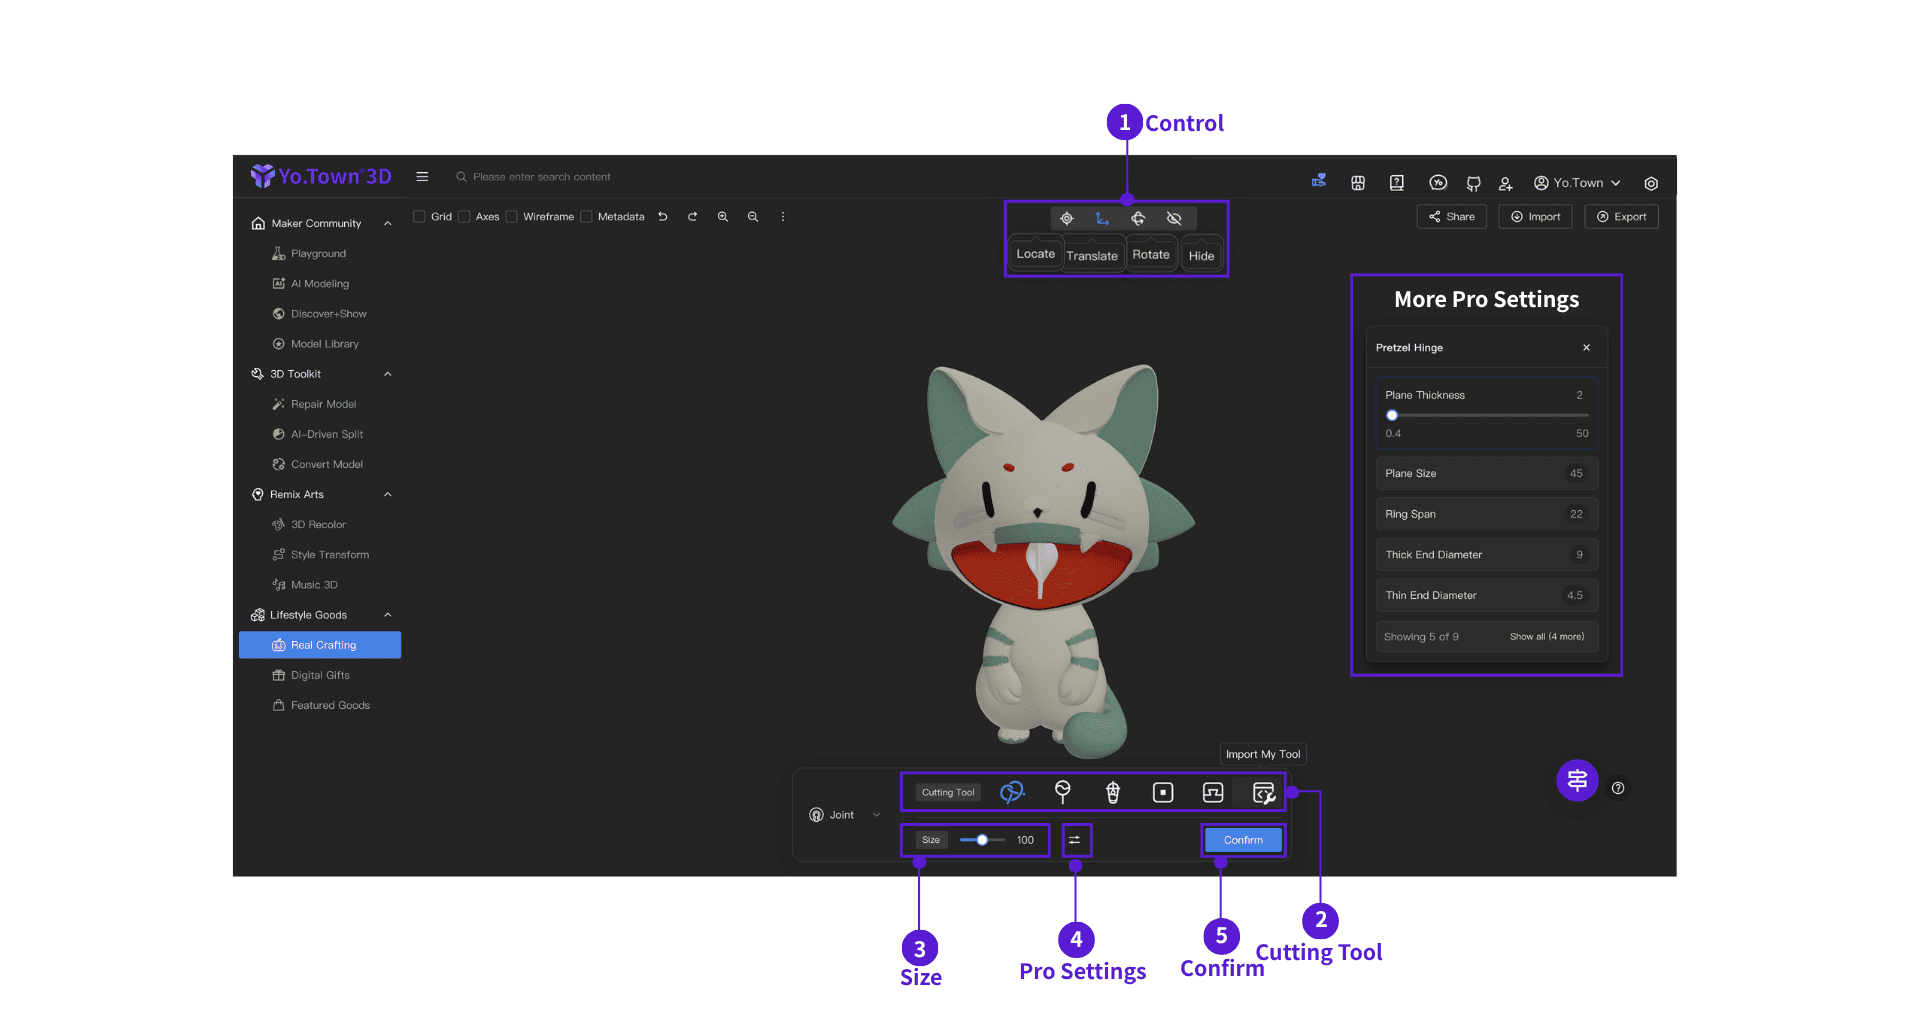
- ⓵ Operate: Use locate, translate, rotate, and hide to position the cutting tool on the model
- ⓶ Cutting Tool: Choose different joint types to quickly create connection structures
Click Import My Tool to upload a custom model and use it as a cutting tool.
- ⓷ Adjust Tool Size: Scale the tool to control joint size and fit
- ⓸ Pro Settings: Fine-tune parameters to precisely control tool size, depth, and more
- ⓹ Confirm: Click confirm to apply the result
Carve
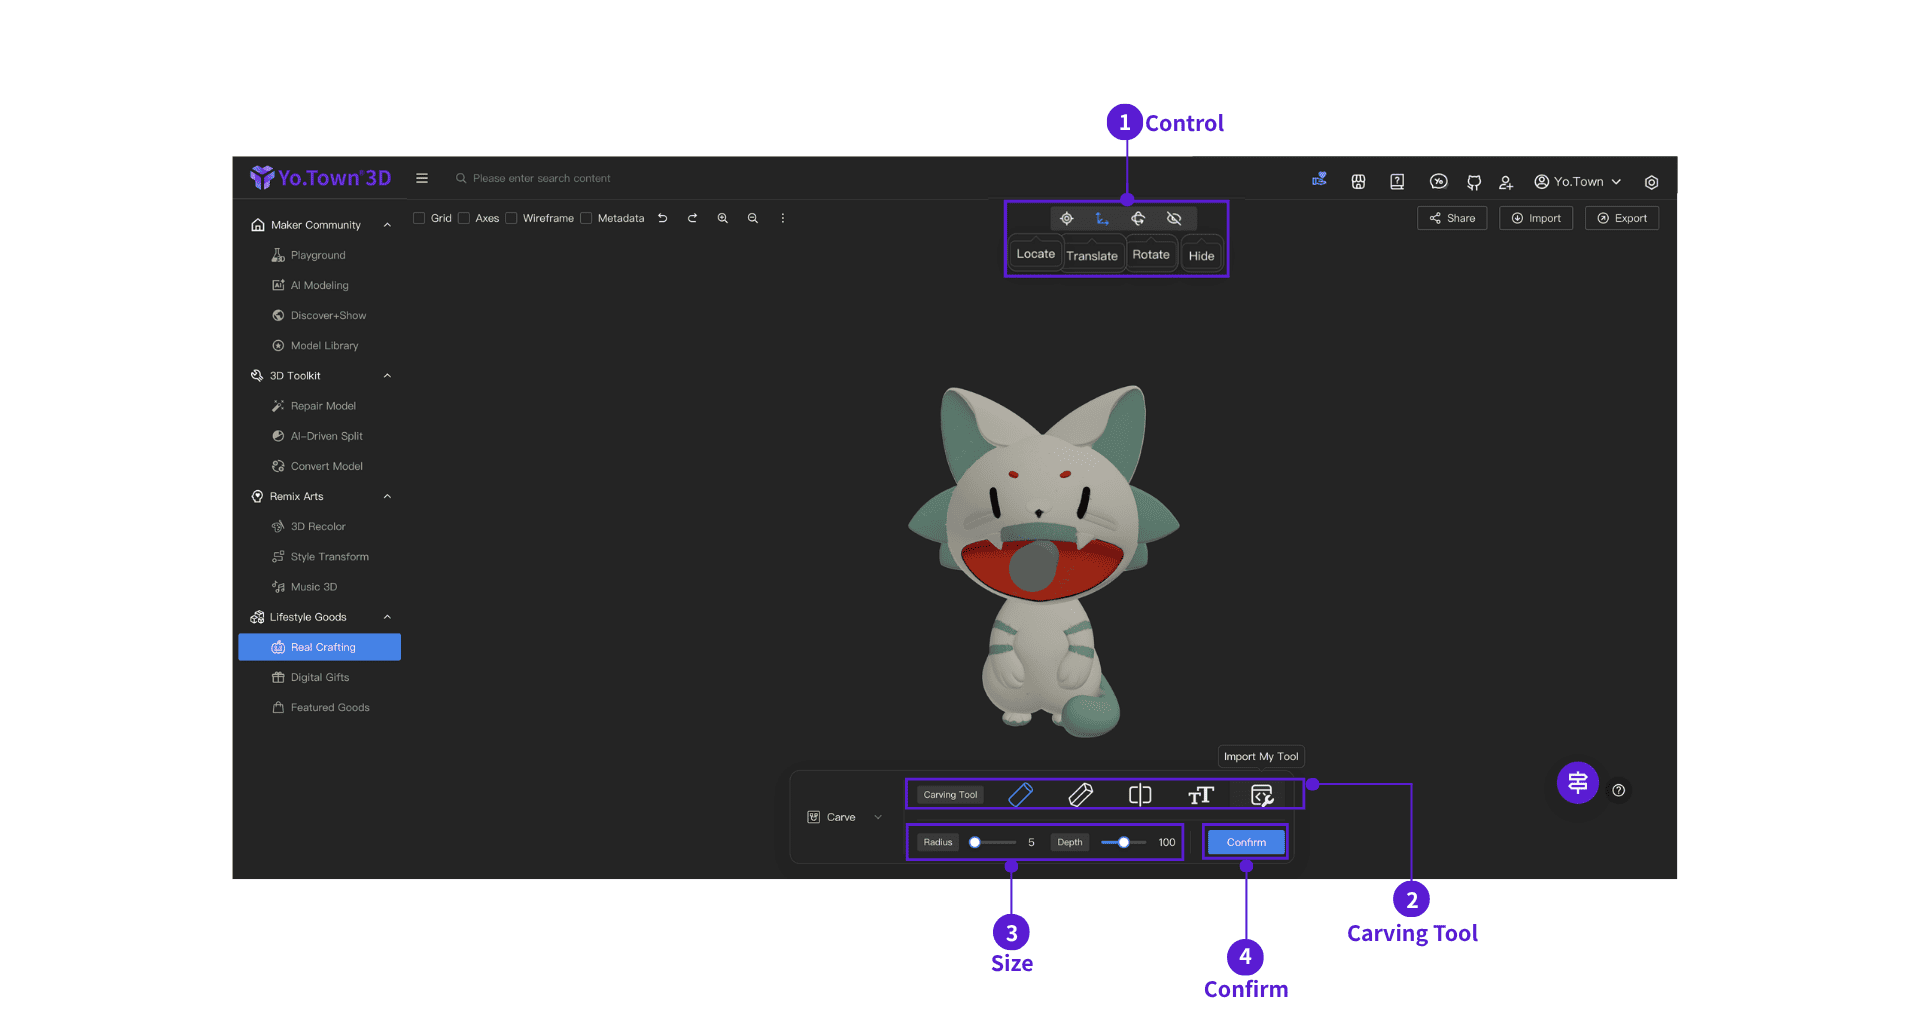
- ⓵ Operate: Use locate, translate, rotate, and hide to position the carving tool on the model
- ⓶ Carving Tool: Choose different carving tools to cut into the model, and adjust the tool as needed
Click Import My Tool to upload a custom model and use it as a carving tool.
- ⓷ Adjust Tool Size: Adjust the size of the sculpting tool to change the carving range
- ⓸ Confirm: After sculpting is complete, click confirm to apply effects
The footprint of a full text line is controlled by Size, not post-creation Width. Set Size before you click Create 3D Text. If text is already created, adjust Size again, then click Create 3D Text to regenerate.
Add-on
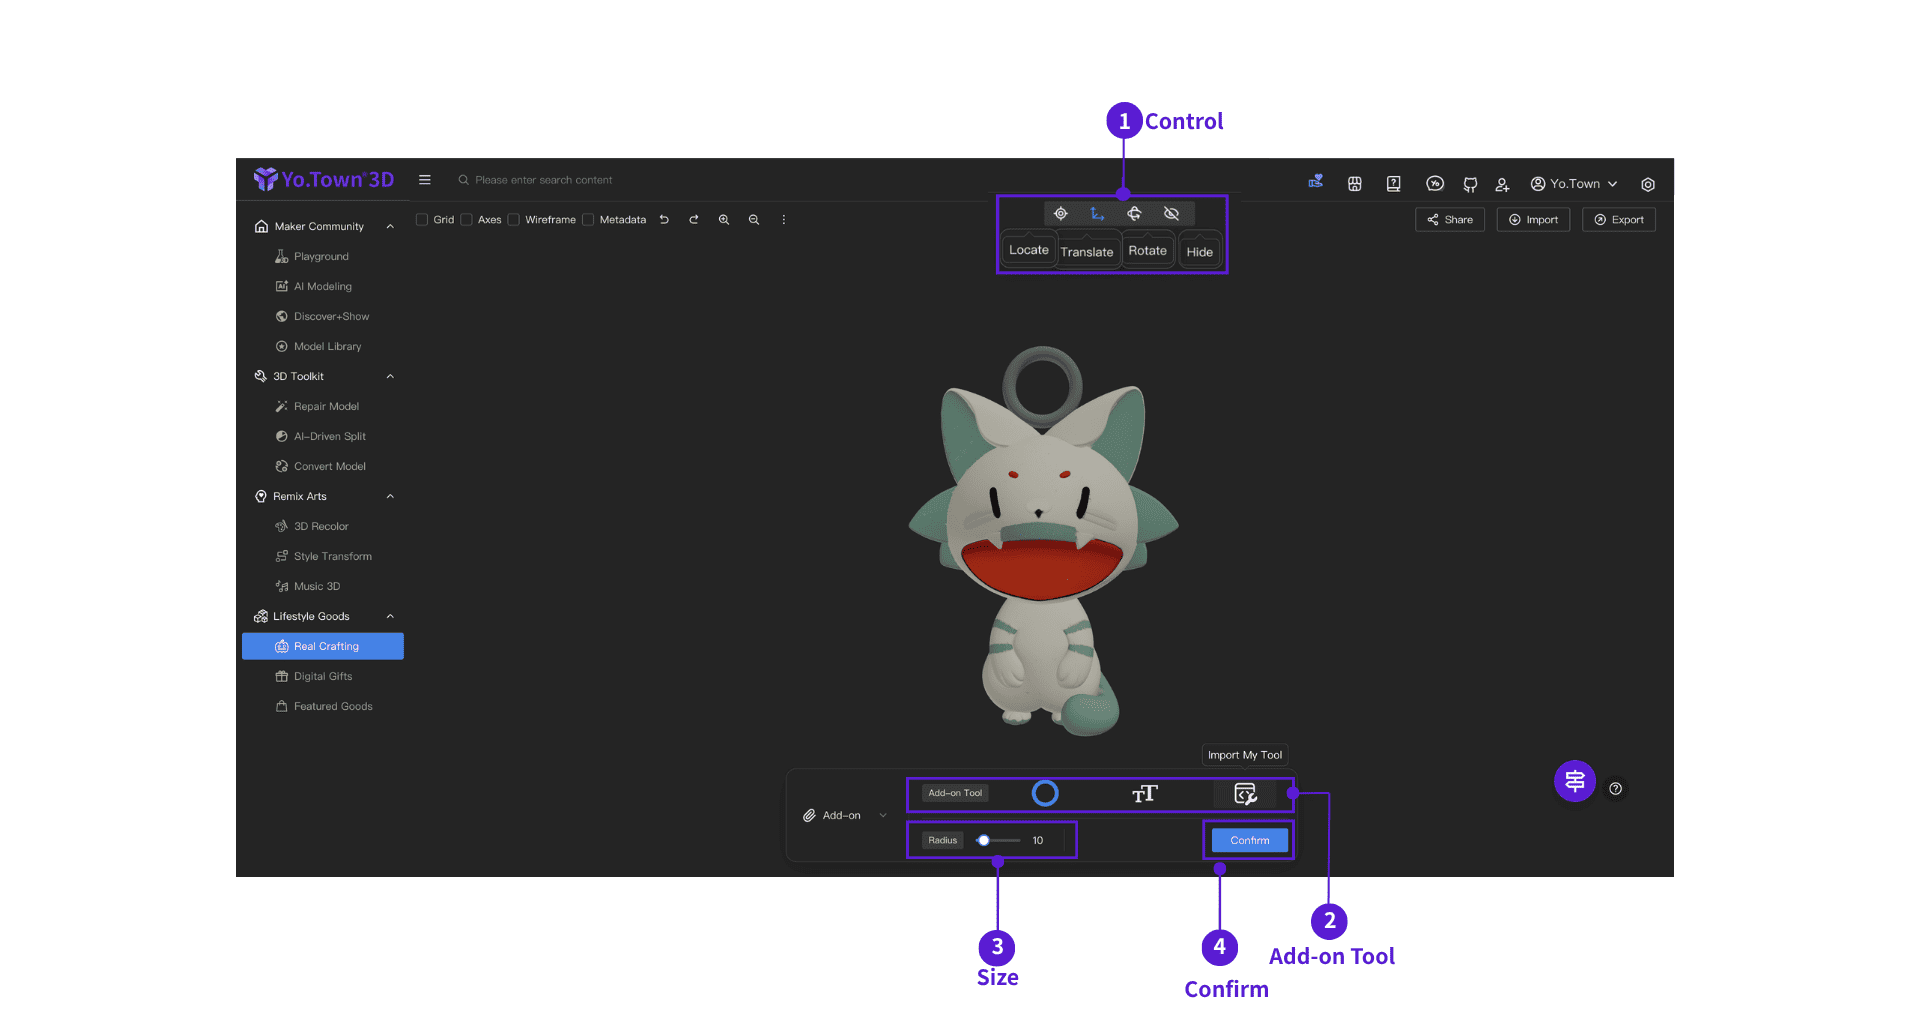
- ⓵ Operate: Use locate, translate, rotate, and hide to position add-on objects on the model
- ⓶ Add-on objects: Attach elements to the model and combine them into more complex forms
Click Import My Tool to upload a custom model and use it as an add-on object.
- ⓷ Adjust Tool Size: Adjust the size of add-on tools to change the attachment range
- ⓸ Confirm Attachment: Click confirm to complete attachment
Base
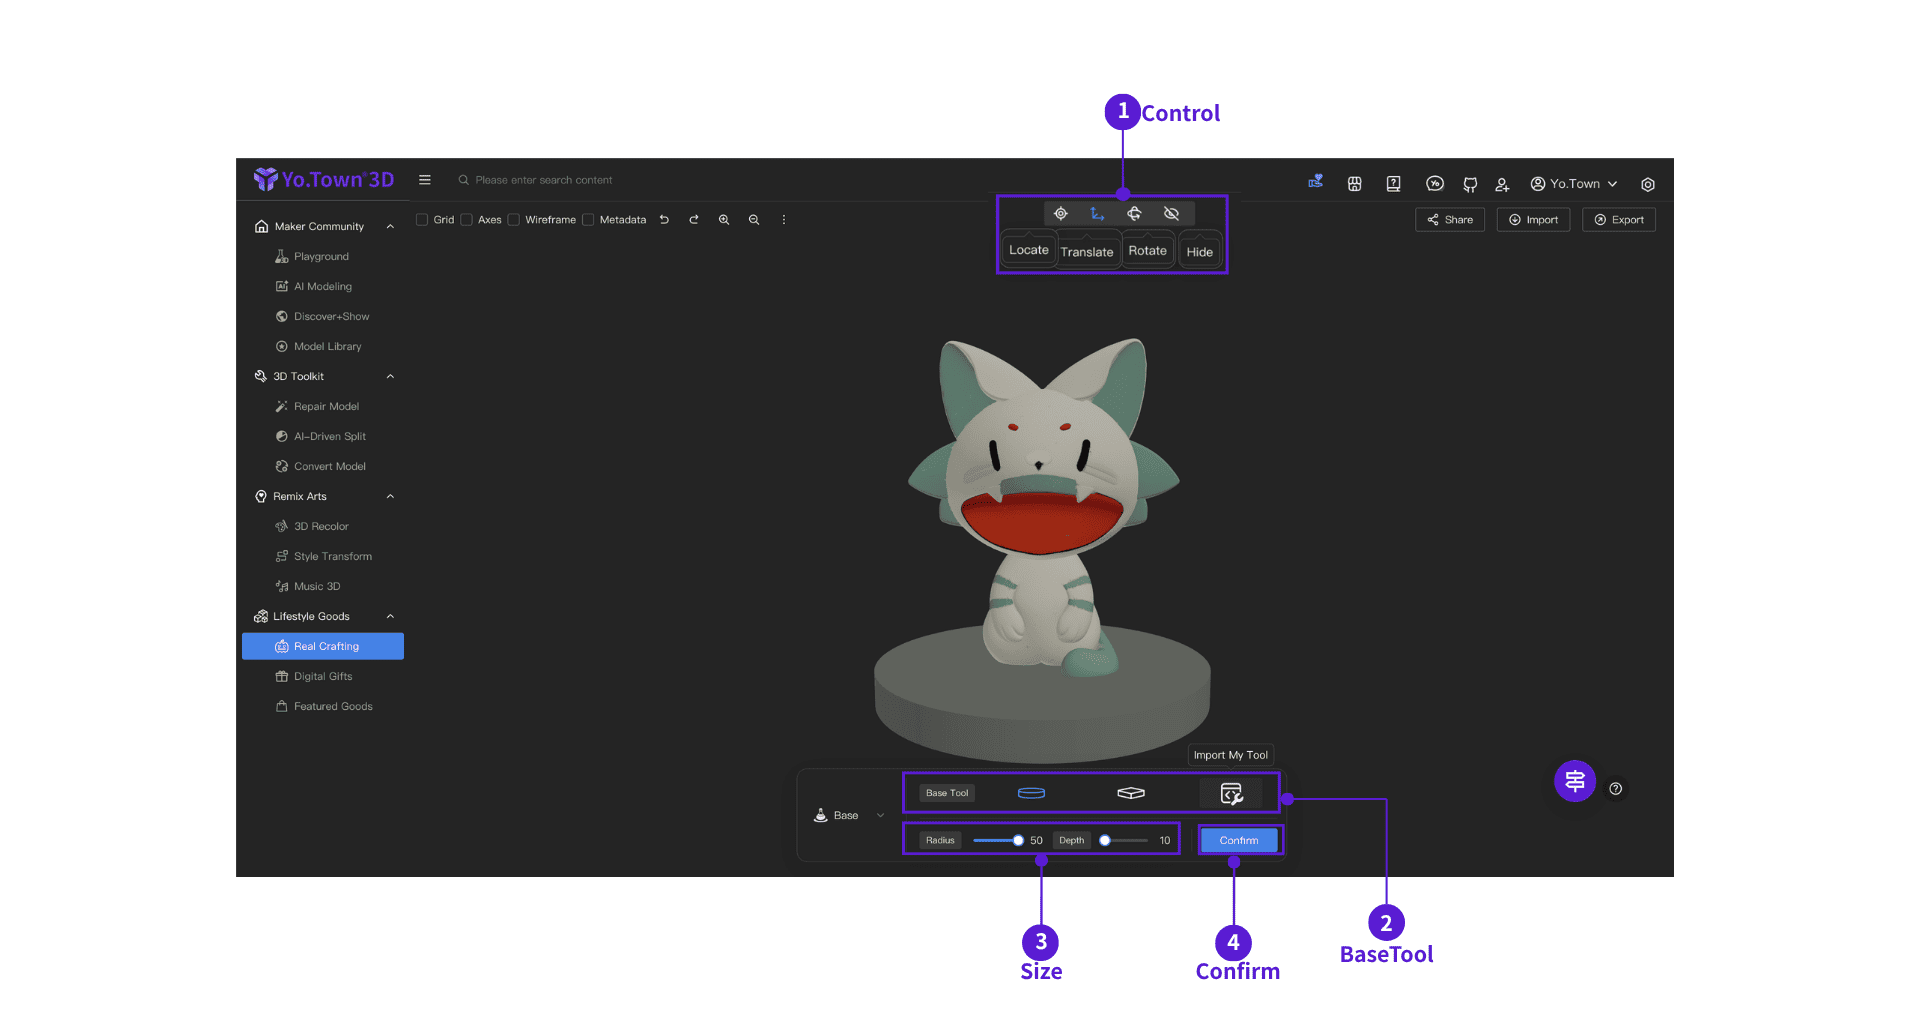
- ⓵ Operate: Use locate, translate, rotate, and hide to position base objects on the model
- ⓶ Base objects: Choose a base type (base or platform) and add it to the model
Click Import My Tool to upload a custom model and use it as a base object.
- ⓷ Adjust Tool Size: Adjust the size of base tools to change the base range
- ⓸ Confirm Creation: After adjusting parameters, click confirm to create the base
After selecting a tool in Real Crafting, click directly on the model surface to locate it. The tool snaps to that surface for faster placement.
If you do not want snap behavior, switch to Translate, Rotate, or Hide in the Operate area, then fine-tune position and orientation manually.
Video walkthrough
FAQ
Q: What should I do if the model is deformed during sculpting?
A: Adjust carving depth and use smaller depth values for gradual carving. If deformation is severe, use undo to restore.
Q: How to precisely control object position?
A: In the Operate area, use Locate, Translate, and Rotate to adjust the position and orientation of tools, add-on objects, or bases before you confirm.
Q: Can I use multiple auxiliary tools simultaneously?
A: Yes, but only one tool can be active at a time. You can quickly switch tools and use them in combination.
Q: Can the base size be adjusted?
A: Yes. Before you click Confirm Creation, use the Radius and Depth sliders in the base panel to adjust the base tool range.
Q: Can attached add-on objects be edited separately?
A: No. After you click Confirm Attachment, add-on objects merge into the target model and can no longer be selected or edited separately. Finish positioning and orientation with locate, translate, and rotate before you attach.
Q: How do I delete model blocks?
A: In the Operate area, use Hide to remove model blocks.
Get Started Now
Click the button above to open Yo.Town Maker's Real Crafting page and start your 3D creation journey.